
When tarp camping, it can be tough to wade through the many setups to find one that works for you. To help with that, I’ve made this list of my 5 favourite easy tarp pitches.

Gear?
These are all best with a 3x3m square tarp – like my DD tarp. That isn’t to say that they wont work with other tarp types, the first 3 will work well, but you’ll struggle more with the last two.
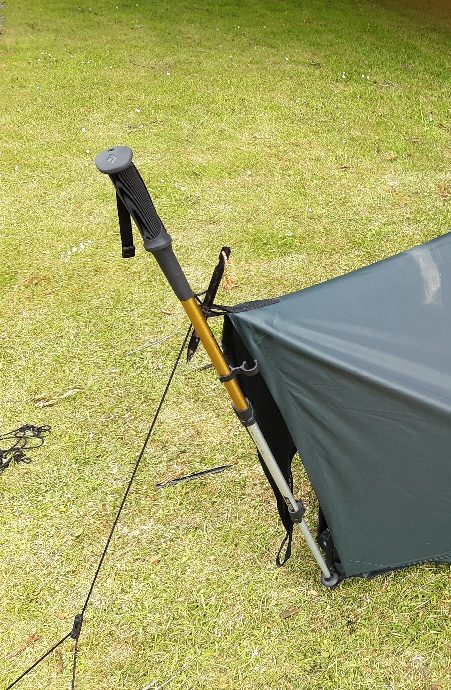
For all of these pitches, I’ve used my black diamond walking poles (review on its way), but if you’re camping in a woodland, you can use trees to tie up the tarp as well.
As for ropes, I’ve used a mishmash of the guy-lines that came with my tarp, and various bits of para-cord.
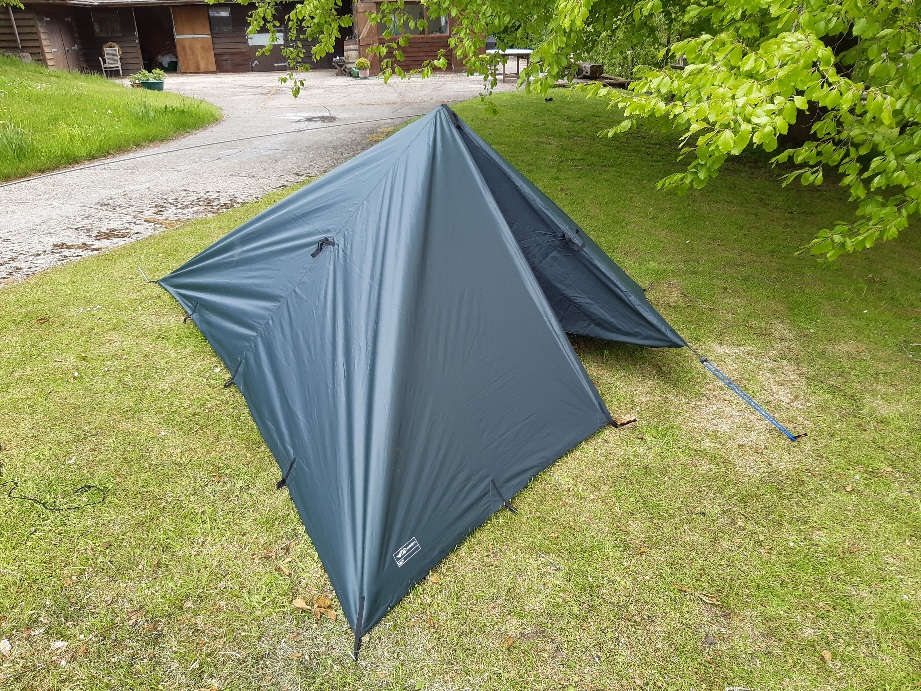
1. ‘A’ Frame

This is about as basic a setup as you can get, but it offers tons of space, and is easy to pitch.
- Start by pegging in two of the corners, so that there is slack along that edge. This is when you determine how tall the ‘A’ frame is; the closer together, the taller the shelter.
- Moving to the opposite side, stick your pole in the ground, then adjust the height of the pole until the tarp is taut, but the pole is still vertical. Then peg out the pole with a guy-line.
- Repeat step 1 with the opposite side
- Repeat step 2 with the opposite side.
- At this point, you may want to go around again and peg out the sides on the ground, to provide additional wind resistance.
2. Lean To
This is another fairly basic setup, but it is useful for when you’re by a fire, as the back of the tarp reflects the radiant heat from the fire. This is also great for when the weather’s good, and you want to enjoy the great outdoors, and it even comes with its own built in groundsheet. It is like half of an “A” frame, with the rest of the material as a groundsheet.
- Peg in the middle of the tarp on two opposite sides, with the ‘outside’ of the tarp facing down.
- Fold the tarp over, using your two poles to hold the two corners up.
- Peg in the two corners laying on the ground, as well as the very middle of the tarp.

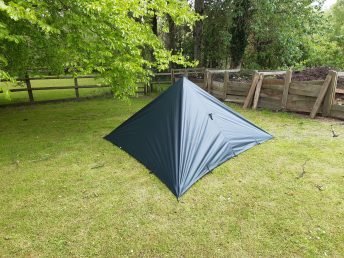
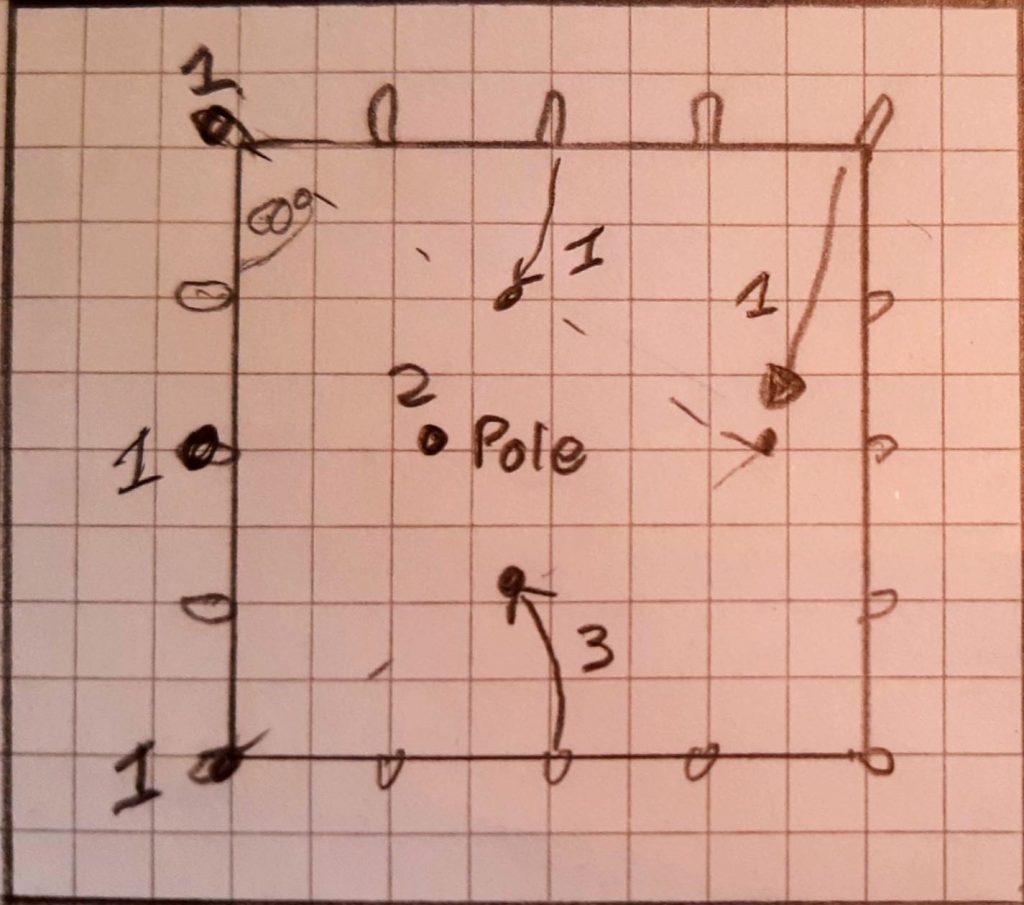
3. Stealth Shelter

This is a slightly more complex shelter, and it requires a bit more in the way of pitching. Having said that, this shelter is great, as it is fully enclosed, comes with its own groundsheet, and is low profile (hence the name). It is one of the smaller shelters, but there is still plenty of space for a person and their backpack.
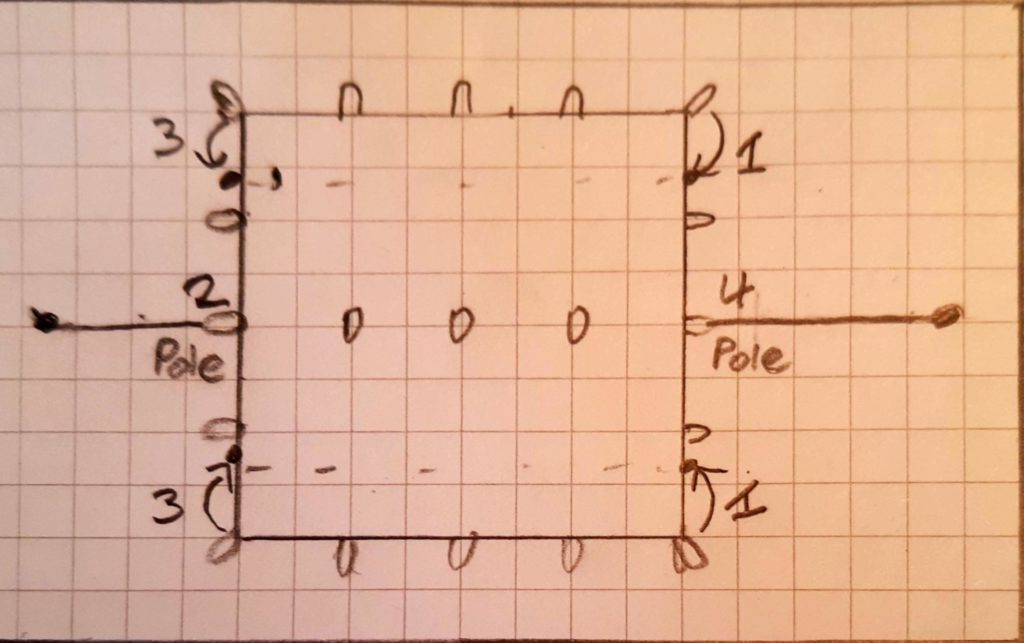
- Start with the tarp folded in half, with the ‘inside’ in the middle. Using a long rope, pass the rope through all the non-corner loops on both side, pegging it in as shown. Make sure to leave a little bit of slack. Repeat this process for the other side.
- With your pole, start by using the tip of the pole to peg in the lower loop at either end. Then adjust the height of the poles until the tarp is taught, and guy out either end. You may want to tighten the ropes from 1 if the shelter is too tall.
- Finally, using a bungee cord, draw together all the corners and tie it to the bottom of the walking pole. Make sure it is easy to unhook the upper corner, as this is your door.
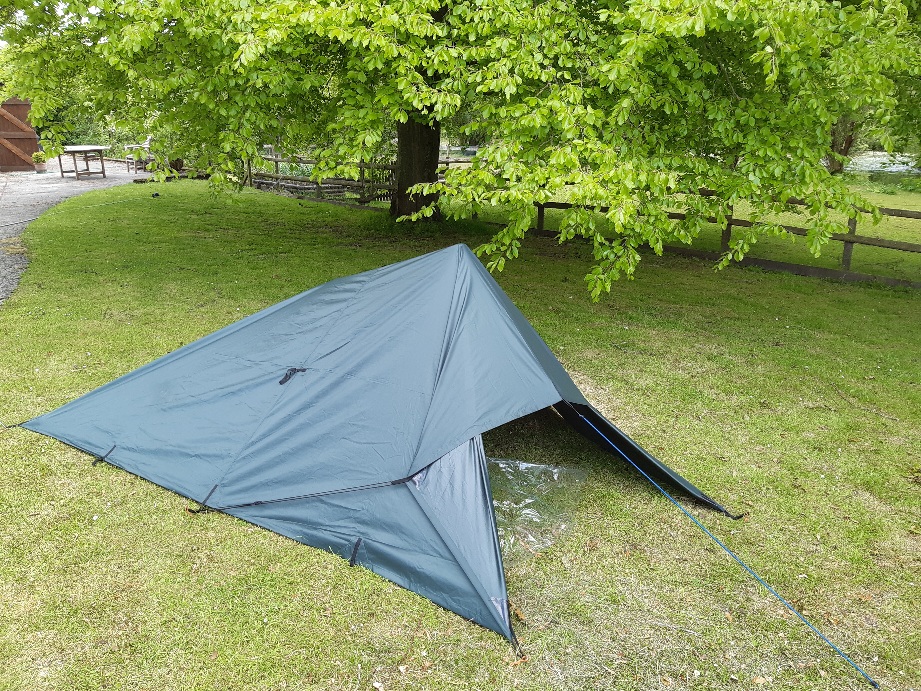
4. Tetra Tent
This is another good shelter for when the weather gets worse, as it offers protection from all directions. You also get a lot of space, and it has a door that can be opened or closed.
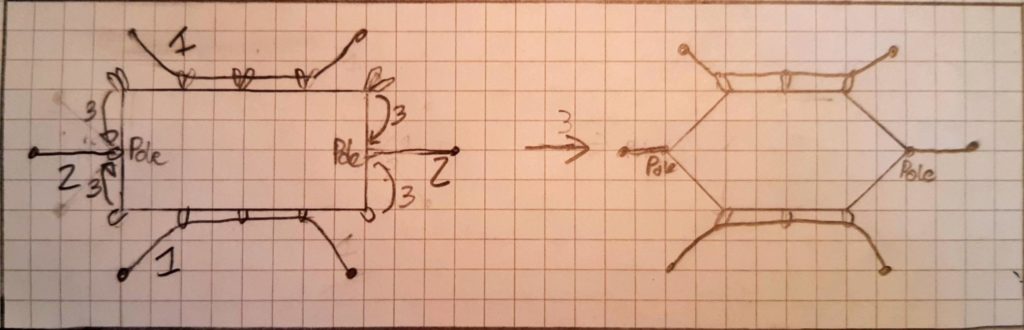
- Start by pegging in three of the corners, so that they form two of the sides of an equilateral triangle. At this point you’ll also want to peg in the middle of these edges to make the tent stronger.
- Next, use your pole to push up the middle of the tarp, so that the two sides of the tetrahedron go taught. Make sure to place the pole in the middle of the tetrahedron, as you’ll otherwise struggle with the next step.
- Next, take the middle tie out point of one of the sides of your tarp. Peg it in so that the its halfway along the third edge of your starting triangle.
- You’re now left with the tetra tent, and a flap of loose material. This loose material is your ‘door’. I like to secure this final flap of material by bungee-ing the middle tie-out to another peg to keep it closed. I stuff the rest inside the shelter so it doesn’t flap around. I can then easily just unhook the bungee to get in and out of the Tetra Tent.
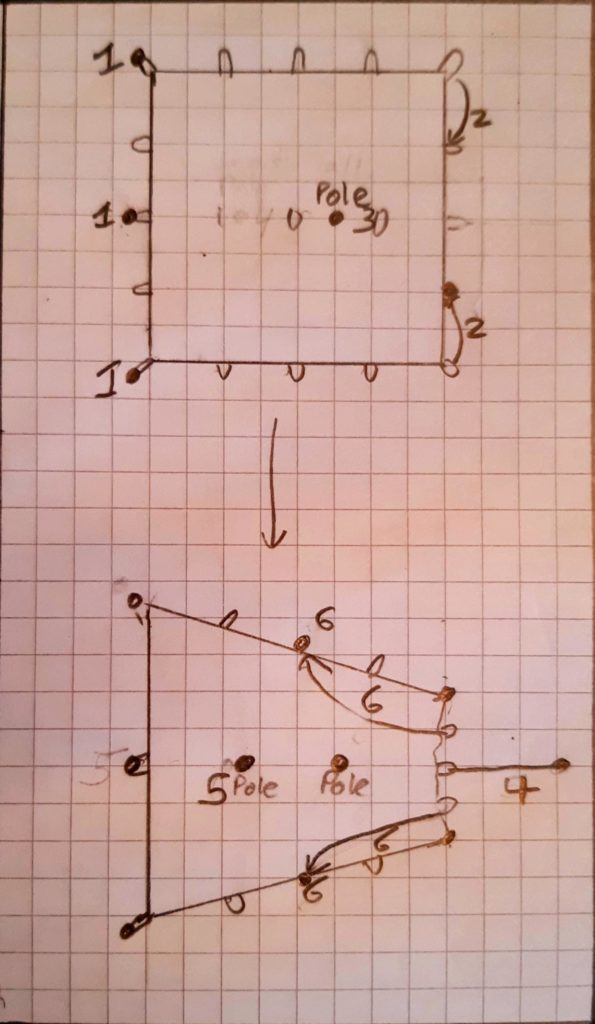
5. Tarp Tent
It is not at all surprising that this shelter has made it to my list of favourite tarp pitches. This is probably my favourite shelter, as it offers a great balance of weather protection whilst still having an easy entrance. It is, however, still a fairly complex shelter to pitch.
- Firstly, on one side of the tarp, peg in the two corners and the middle so that that side is taught.
- Next, peg in the far corners where the first tie-out in would be if the tarp was laying flat.
- Use one of your poles to push up the tarp, about 2/3 of the way along the tarp.
- You’ll now have a bunch of baggy material at the front of your tarp tent. Taking the middle tie-out from this loose bit of the tarp, use a guy line to peg it out.
- Now you can use your second pole to give yourself some more room.
- Finally, peg in the middle tie out point on the two tapering sides, and using a pair of guy lines, tie the last two tie out points from the baggy section to these pegs.
All in all, there are a huge number of tarp pitches, but these 5 pitches are a great place to start. These cover all kinds of weather, and there is nothing stopping you modifying each of the pitches to suit. There are plenty of great setups online, here are just a couple:DD Hammocks, Google Images, Youtube.
With a centre pole chimney a tarp can be tight to the ground on all sides for a winter blizzard or the same pitch can raise all sides in summer sun.