What is Delamination
Delamination is where two surfaces that are glued together break apart. In this case, we’re focusing on the rubber parts of boots and shoes – like the sole and the protective rubber rand – coming off. When this happens, your boots can quickly become unusable because they fall apart. However, if caught in time it is a very easy thing to fix.
What you Need
In order to solve the problem, you really don’t need very much at all:
- The boots themselves
- A clean cloth
- Small matchsticks (or similar)
- Masking tape (recommended but not essential)
- Contact adhesive glue (see below)
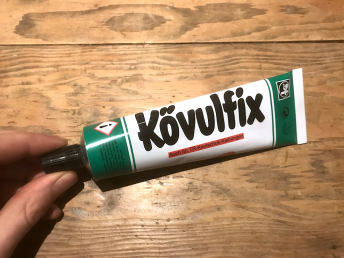
The Right Glue – Contact Adhesives
Contact adhesives are a category of glues where you apply the glue to both faces you want to attach, then leave the glue to become touch-dry before pressing the surfaces together firmly. Unlike most glues, the main influence on how strong the bond will be is not how long you press the two surfaces together, but how hard. This means hitting a joint with a hammer is better than holding it closed for an hour (but I don’t recommend hitting your boots with a hammer…).
Pretty much any contact adhesive will work for most boots, but after a bit of research I went with Kövulfix, available from Amazon.

Method
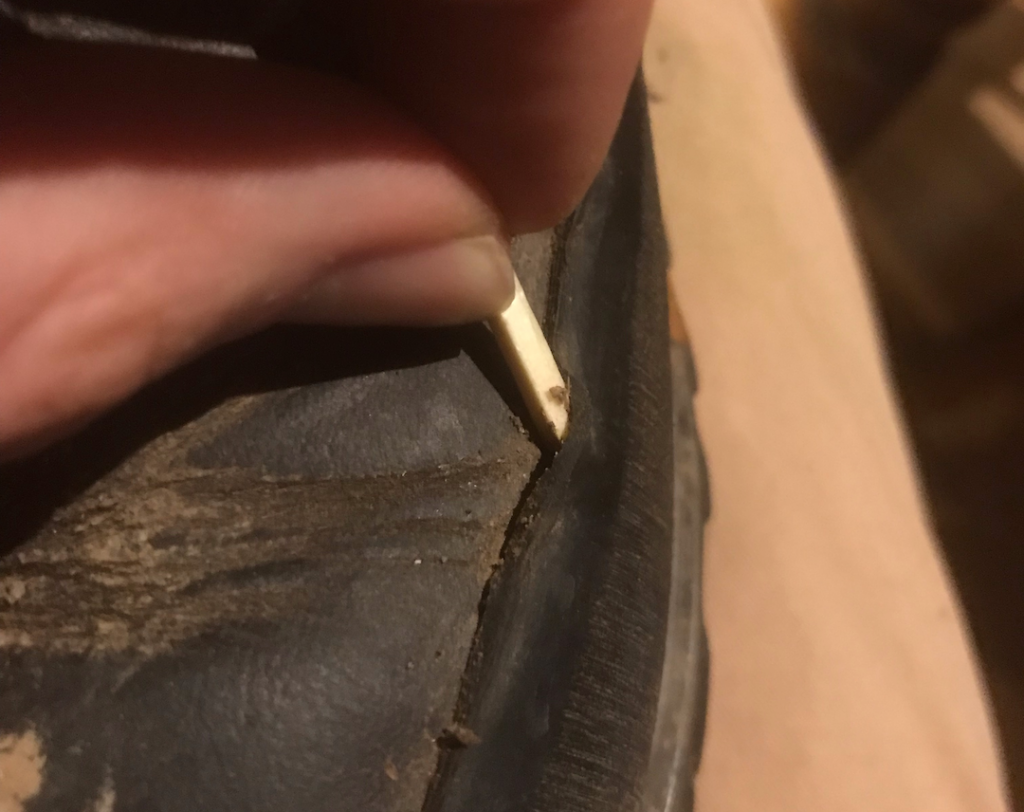
1. Find Delamination
If there is one area on your boots that is visibly delaminating, it is more than likely that other areas will need attention too. The first thing to do is to go round all the rubber parts of the boot and check adhesion thoroughly – it will help if you clean off the worst dirt at this stage.
2. Prep Surfaces
Once you’ve found all the areas where rubber is coming unstuck, they need to be cleaned thoroughly. It is especially important to clean the areas you’ll be applying glue to, otherwise the glue will stick to the dirt, not the boot. In the cleaning process, you may find that the delamination is actually getting worse: don’t worry too much about this, we’ll be gluing everything back later and cleanness is essential for a good bond.
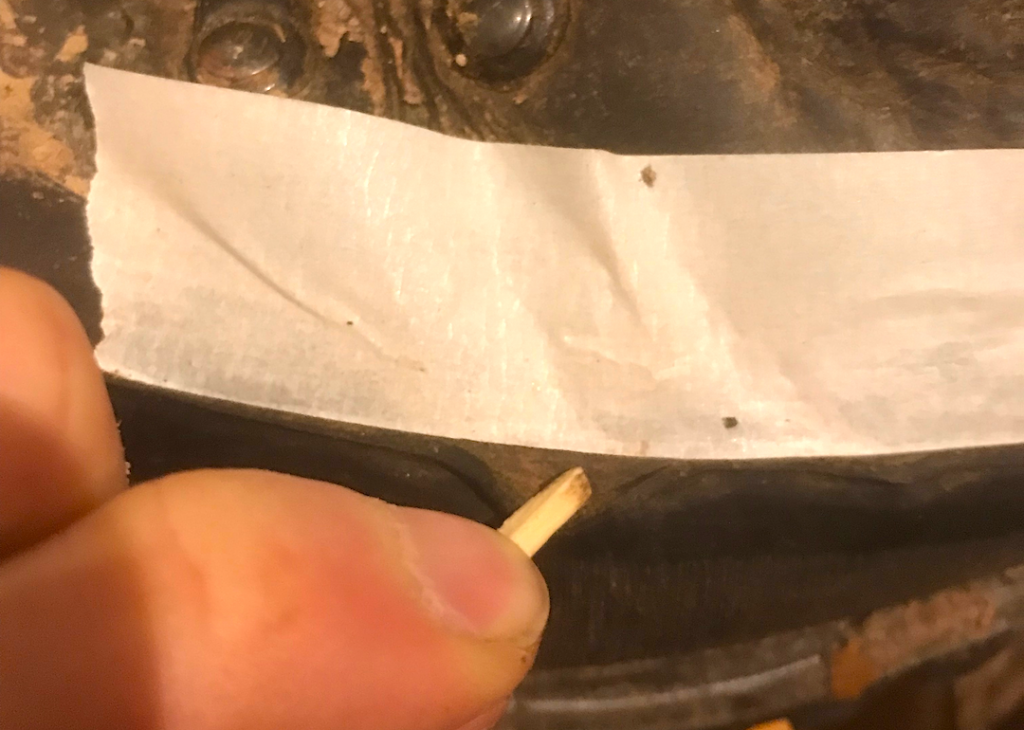
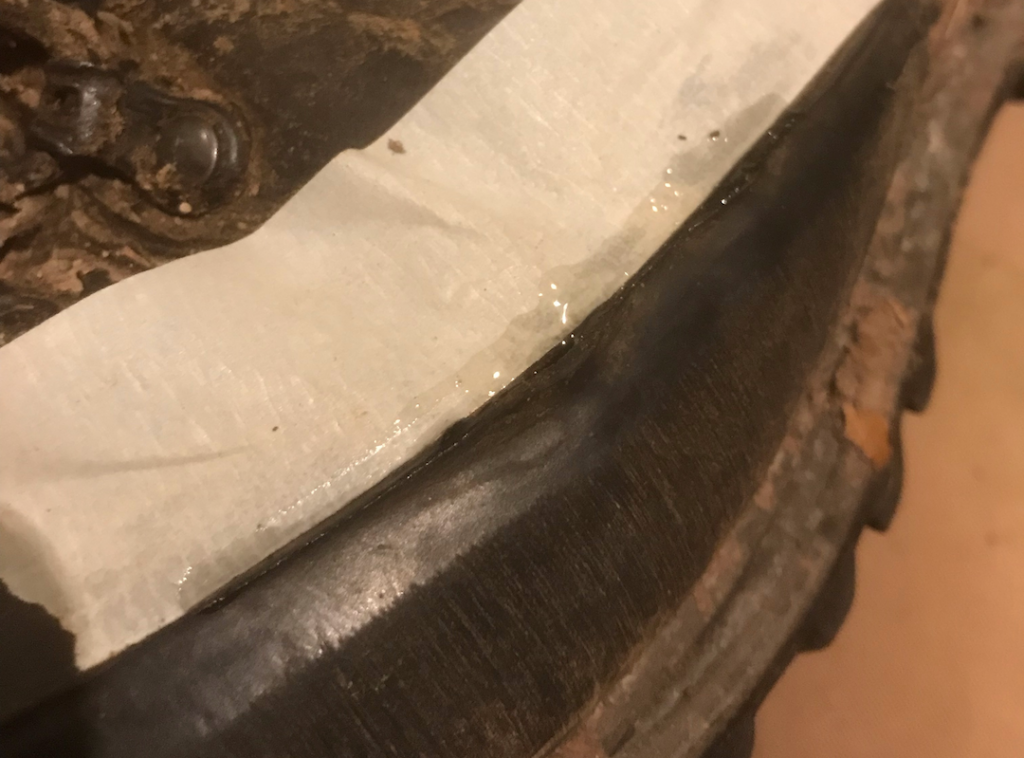
3. Mask Off
Though not essential, I highly recommend this step as it makes the end result look considerably more professional.
Put a strip of masking tape along the side of the boot, covering the areas you don’t want to glue (see picture). This will mean that, once you’ve glued the rubber back on, there won’t be glue squeezed out all over the rest of the rubber: even though the glue dries clear, it’s still very noticeable.
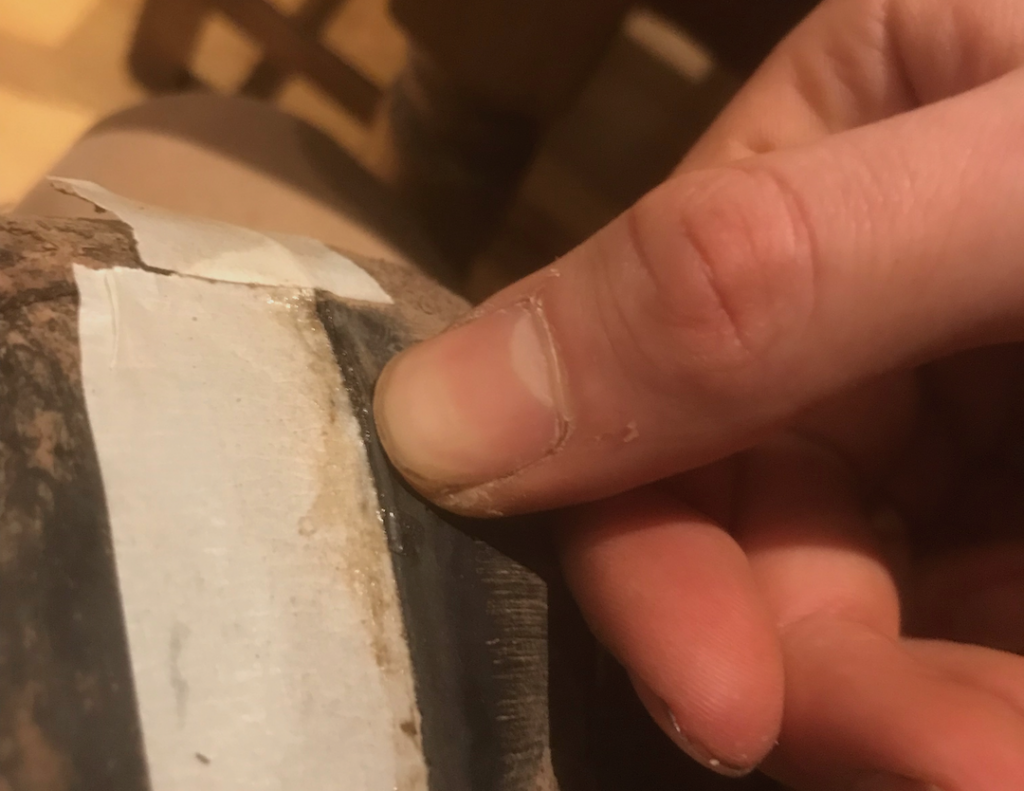
4. Apply Glue & Wait
One you’re ready and all the surfaces are clean, you can begin applying glue. It is surprisingly runny, so be careful not to apply too much. Using the matchsticks (snapping one in half often leaves a thinner point), work the glue down into all the cracks on both surfaces. At this stage, don’t push the two surfaces together.
Depending on your glue, you will need to wait up to half an hour for it to set up. Check the instructions on the glue – but for most, you need to wait until the glue becomes dry but tacky to the touch.
5. Press
Once you’ve waited the required amount of time, press the rubber onto the boot as firmly as you can. I find it helpful to get one hand inside the boot and push down onto it from the outside. As mentioned above, it is how hard you press – not for how long – that influences how well the joint will glue.
Be careful to this stage – as soon as the two sides touch, they will be stuck. Make sure to be extremely precise with positioning, and once you’re happy, commit and don’t try to move anything around. Make sure not to stretch thin rubber as you’re pressing it on as this will leave baggy areas on other parts.
Pull the masking tape off as soon as you have pressed the halves together, or it may get stuck itself.
6. Leave to Cure
Some (but not all) glues will need you to leave them to cure fully before wearing the boots. Whether mentioned on the packaging or not, it is a good idea not to wear the boots for at least 24 hours after gluing.
Final Notes
As with any self-repair, these glue joints are unlikely to be as strong as ones from the factory, and may start to break apart again over time. The tubes of glue are large, however, and re-gluing is not a difficult process. I’ve recently done this on my Lomer Pelmo (review here) boots, and it has given them a new lease of life.