
For any expedition, making route cards is an essential step in the planning process. This is particularly true for supervised expeditions like the Duke of Edinburgh. This short guide will show you how I make my route cards.
Why Route Cards?
I’m sure you’re thinking right now “Why do I need route cards? I’m not going on a supervised expedition.” And while route cards are essential for meeting up with an assessor / supervisor on an expedition like DofE, there are many reasons to make them regardless.
Firstly, route cards hugely help in pacing yourself for those longer expeditions. They’re also great for letting loved ones know where you are. Route cards are also a great navigational aid, as they give you points to aim for and get back on track. Finally, if you’re going on a group expedition, they can help if one of the group gets lost, giving you a rendez-vous.
1. Split up your route
At this point in planning your expedition, you should already have your final detailed route. The first step in making route cards is to split this route into shorter segments, or legs.
When making my legs, I like to aim for a consistent walking time of ~1hr. This is because I always have a break at the end of a leg, giving a bit of leeway in terms of the timings. For this same reason I like to pick end points that make a good stopping point.
You should also aim to make the end of each segment recognisable, to give you a way-point to look for.
2. Record the legs
This is the point when you start filling in your blank spreadsheet / routecard. I like to start by filling in the grid reference and description of each start/end point. Next, for each leg in turn, I write a short description of the route I’m taking (this is more optional, but can help with navigation).
Then comes the most time consuming bit; recording the distances and height climbed. There are two ways to do this, either using your physical map, or doing it online.
Physical Map
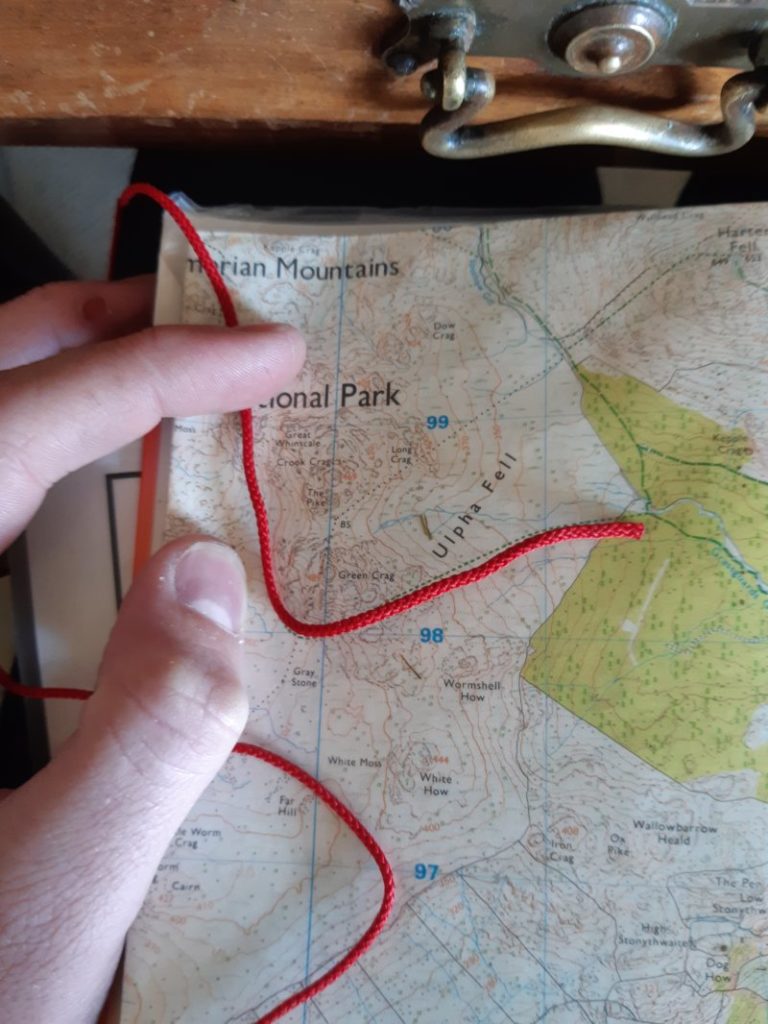
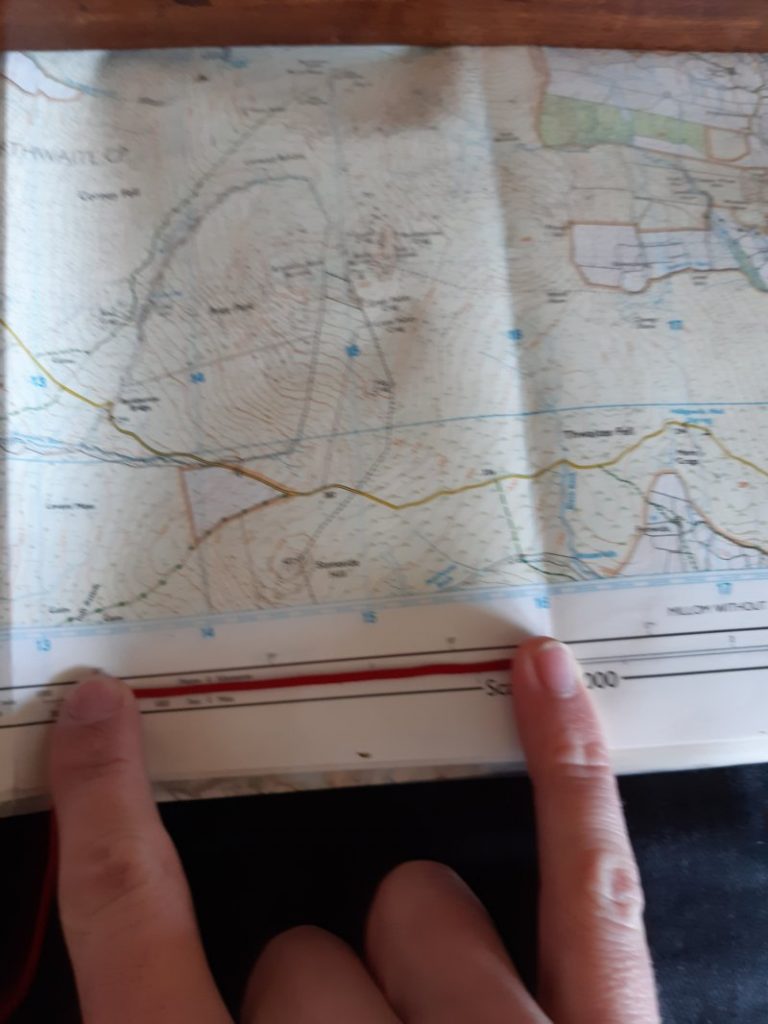
For a physical map, first get a piece of string (the one holding your compass works well). Then, starting from one end of the string, lay it along the length of your leg.
Then, using the scale from your map, measure the length of your string. This is the distance of the leg.
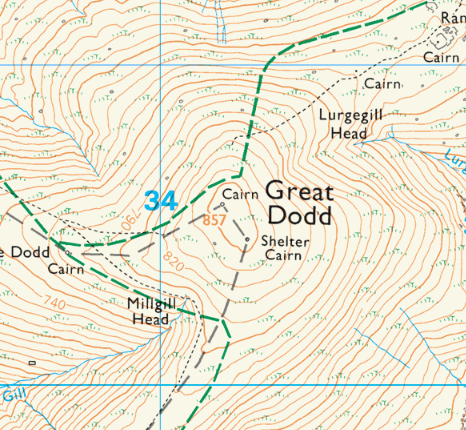
As for the height climbed, find each climb on your route, use the contour lines to find the start and end height of the climb, and find the distance. Do this for each climb, and find the total height climbed.
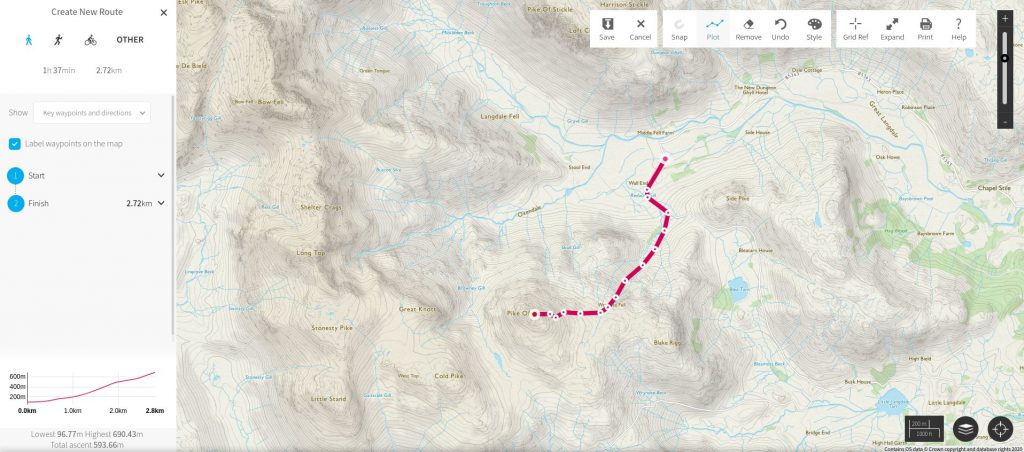
Doing it Online
When I plan my routes online, I use OS maps (both the app and online), though there are other options.
First, I input the leg, and it then displays both the distance and the height climbed under the route info.
Having got the distance and height data, I then put this into the spreadsheet for each leg.
3. Timings
This is the final step in making your route card, and consists of calculating the time for each leg. This is the point at which making the route cards in a spreadsheet becomes a lot easier.
Firstly, you want to calculate the active time for each leg. To do this I use Naismith’s Rule on top of my normal walking speed. This basically means that the active time = walking speed * distance + 1 min for every 10 metres climbed. For the walking speed I use 3-5km/h, depending on various factors. 3km/h is a good number to start with for walking with full expedition packs.
Then once I’ve calculated the active time for each leg, I add a rest time to each leg, to get your final times for each leg. I normally allow 5-10 minutes of every hour of rest.
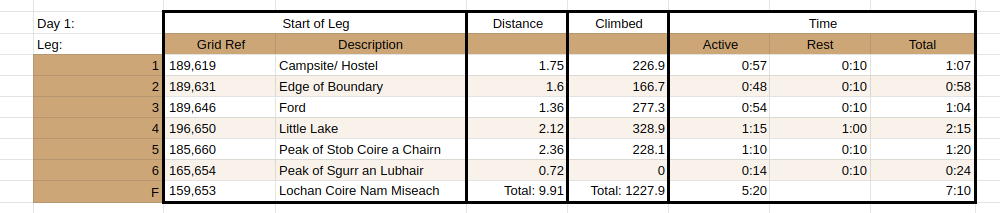
Then once you’ve put everything into your spreadsheet, you should end up with something like this (this was from our gold DofE assessed expedition).