
When planning a hiking expedition, the first thing you’ll need to do is plan your route. Here’s a step by step guide to planning your route, using the example of a 3 day hike in the High Peaks.
A note on maps
Before you can even get started, you need a topographic map of the area you’re travelling to. There are numerous options, and this will depend on which country you are in, and this is largely a matter of personal preference. In the UK I always have used OS maps. This is both because they cover the entirety of the UK, and they can link to the OS Maps App to download a digital version.
1. Where to go
Long before this point, you will have decided generally where you’re going. However, you’ll need to narrow your search down much further, as most places are far too big to cover in a short walking trip.
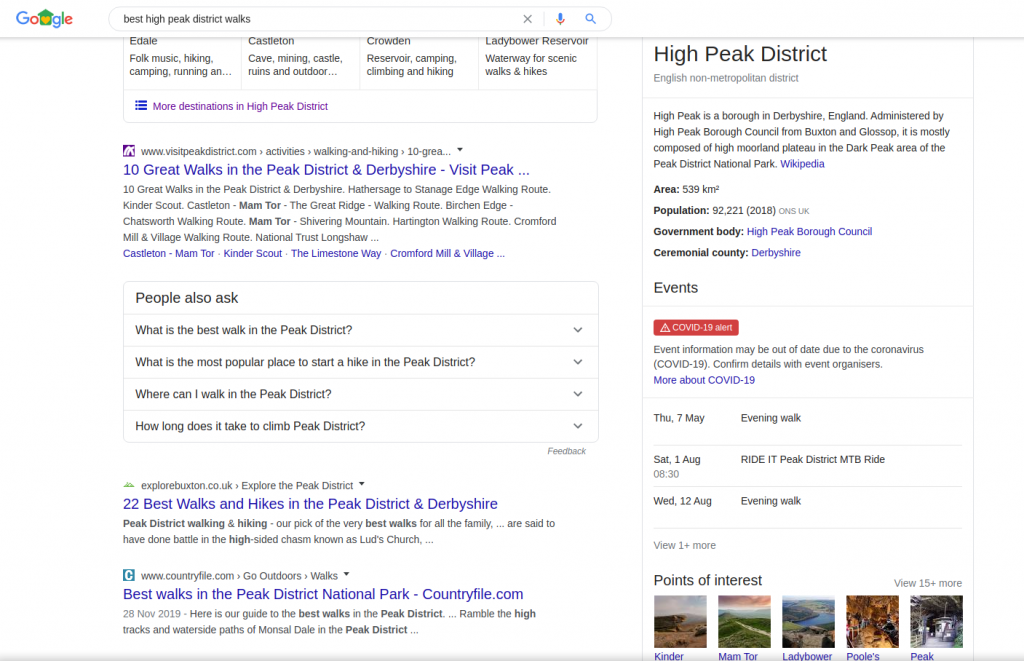
One of the best ways to do this can be as simple as searching ‘Best ____ walks / sights / wildcamps’ into google, and finding some places you want to visit.
After looking through the various results, I’ve decided on 6 things I would like to see on the expedition: Stanage Edge, Kinder Downfall, Mam Tor / Great Edge, the Grindsbrook Clough scramble, Madwoman’s Stones, and walking on the shore of the Ladybower Resevoir. I also want to have one wild-camp up on top of Kinder Scout.
I can then mark these points on my map and start on the next step in planning my route.
2. Rough Plan
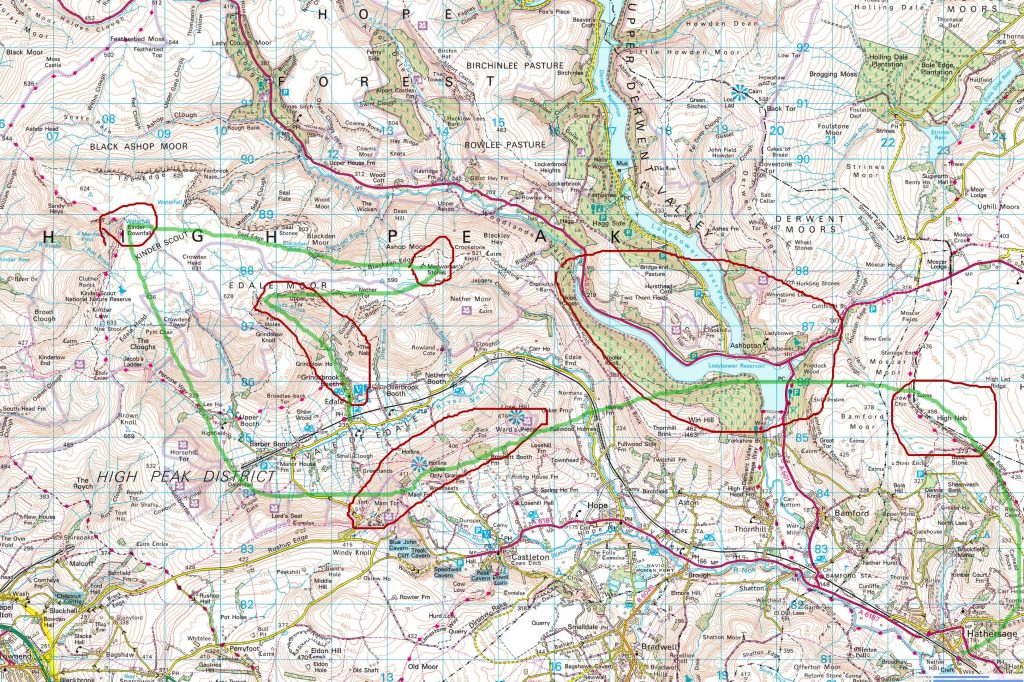
Now with the places I want to visit circled in red, I can come up with a rough plan for my route.
In this case, since I don’t want to have to take a car, I’m going to start and end at train stations in Edale and Hathersage, roughly following the green line. So I’m hoping to start in Edale, and end up in Hathersage, ticking off my points of interest along the way.
At this point, you should start thinking about the distance you’d hope to walk, making sure not to overdo it. So in this case, I’ve made the total walk ~50-60km, which I’m happy to walk in 3 days.
3. Where to sleep
Now we have the final step before planning the final route; choosing where to sleep.
Campsites
Most walking maps will have campsites marked on them, so finding them is fairly easy. If you cannot see a campsite though, do not despair, there are often campsites not marked on the map. A quick google often helps with this.
Wild-camps
This requires a bit more thought than finding a campsite, but there are three main things to focus on for a wildcamp. You can also often google to find out some popular wild camp locations. This is only a very rough overview. If you’re actually planning on wild camping, check out this much more detailed guide.
Water source:
Make sure there is good access to a source of running water. Water purification is essential!
Exposure:
Make sure the wild-camp is not too exposed (i.e. not on top of a mountain), to protect you from the weather.
Good Ground:
Basically don’t sleep in a bog.
For this example trip, I would like to have one night of wild-camping, and one night of camping. In this case I would also like a campsite at the beginning and end of the trip. For this I’ve decided:
Night 1: Campsite in Edale
Night 2: Wild-camp by Kinder Downfall
Night 3: Campsite in Nether Booth
Night 4: Campsite north of Hathersage
4. The Final Route
Now that we’ve done most of the hard work planning, we’ve reached the easy bit. This is the walking equivalent of connect the dots. Just connect your various bits of the walk, though stick to access land (footpaths / open access land). You don’t want to get in an argument with an angry farmer.
For my route, that leaves us with these three days:
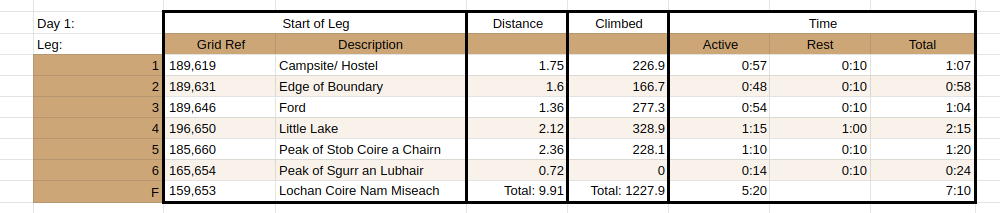
Day 1:
Day 2:
Day 3:
5: Routecards
The final stage in planning your expedition route is to create routecards for your walking. These are basically tables which split your route up into smaller sections (legs), with distance, height climbed, time taken, and rest time for each leg. Check out this post for a more detailed look into routecards.